Showing posts with label artwork. Show all posts

Friday, May 15, 2015

Friday Faves- What I Want Edition


Today I'll be sharing 'Just A Little' rambling assortment of my wants, wishes, and desires lately.


#1 Tombow Dual Brush Pen: I've been trying my hand at lettering things lately. Mostly for fun, although I decided to add a few prints to my Etsy shop to see if there was any outside interest in them.  Right now I have this Faber-Castell Pitt Brush pen, and it's ok, but I don't feel like it is super fluid and can't get the downstrokes as thick as I would like. I've been reading blogs and reviews and the Tombow seems to be a pretty well liked choice. I've yet to pick one up, mostly due to the fact that none of my local craft supply stores sell this brand. I need to bite the bullet and just order one online already!

Here's a peek at some of my current practice:

'


Switching gears to a fashion desire:

Spot the common item in these cute outfits


Did you figure it out? 


#2 Converse - I know these are nothing new, and possibly I'm just being influenced by the current trendiness of them, but I'm pretty sure I NEED some in my life. Soon. 

As I get older I am finding the need to be pickier about the shoes I wear. I need support, I need function. But I still need cute! (What gal doesn't?)

I tend to wear pretty comfortable, yet polished looking outfits on the daily.
 I would wear any and all of the above outfits any day of the week.
I love to be comfy,
 but I just don't feel my best when I'm wearing yoga pants and a frumpy t-shirt all day. 
Therefore, regular sneakers are in my closet for  workouts and yardwork only. 
I wear flats or sandals all. the.time. but I've been finding a need to wear something casual on my feet without wearing actual tennis shoes....

Enter my desire for some converse kicks. 
I'm thinking white? But my oh my how I love grey, too.
Decisions!

(BTW, love the blogs of those last two women)


Totally Random- but everytime we read this Pete the Cat book I think of my desire for white converse and how they might not stay so white. 


We love Pete the Cat around here, and apparently he has some lessons for a mom that wants white converse to learn, too ;)


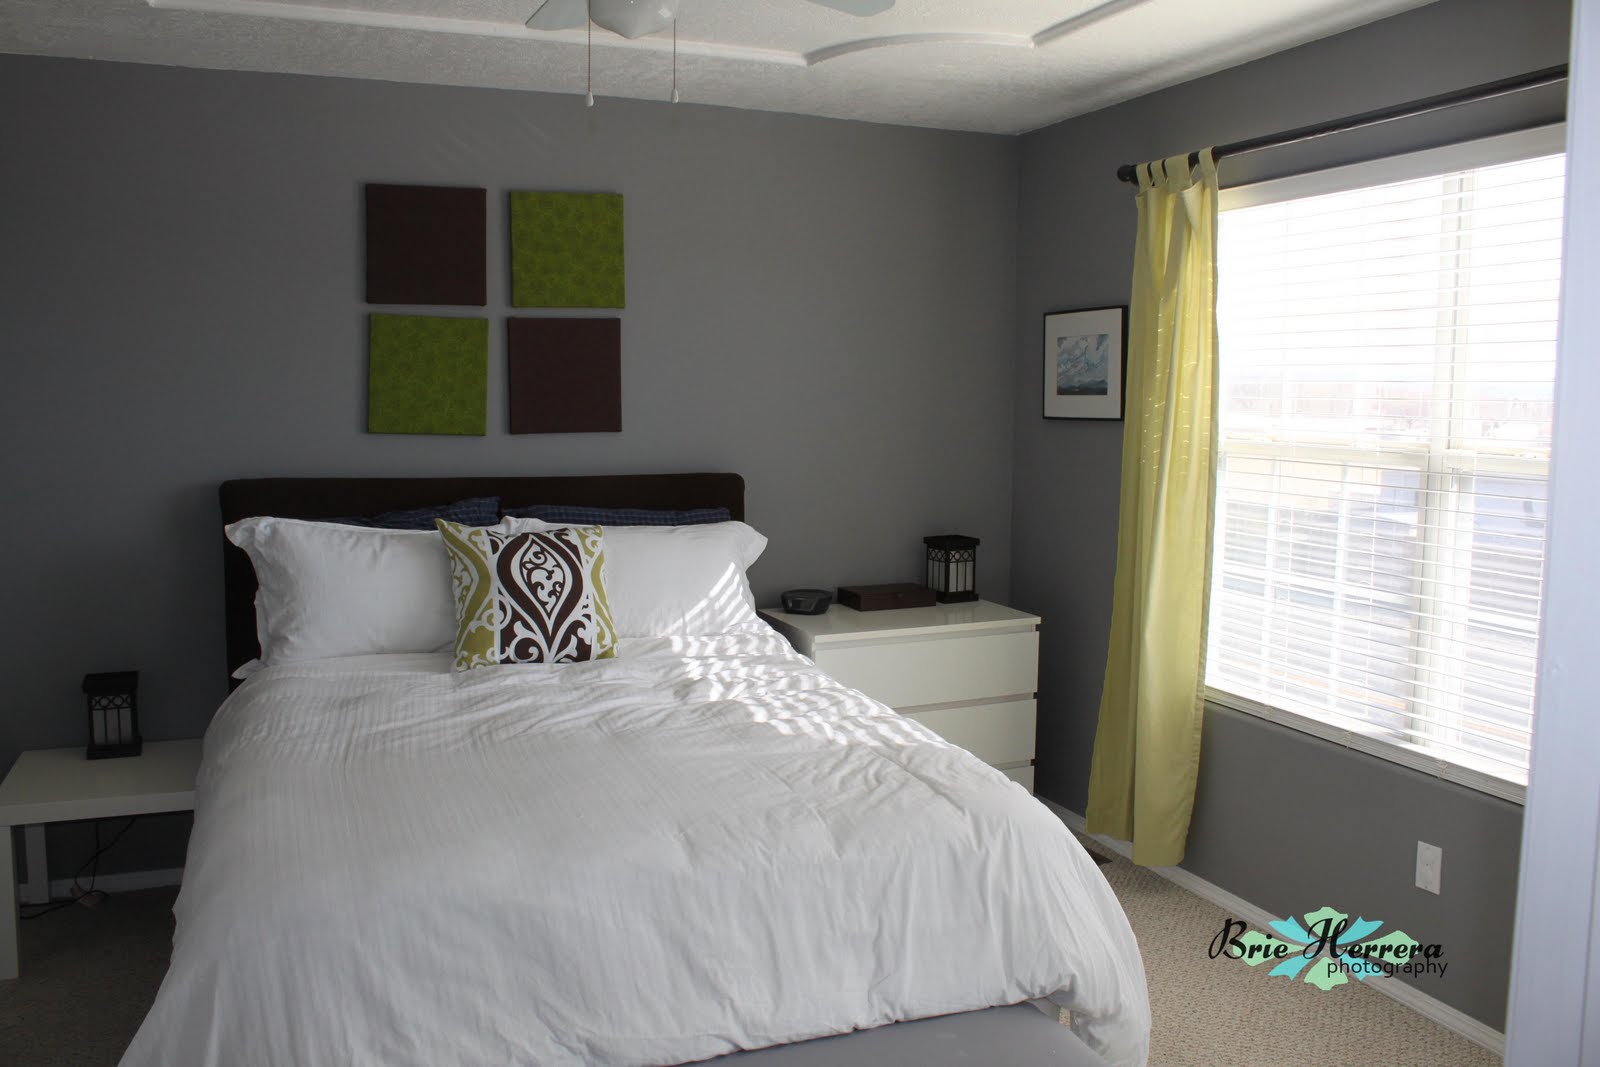
#3 Ampersand Pillow - I think this would look nice on our bed, 
 currently we have all white bedding that needs some accessories.
 Roy might think otherwise when he has to move another pillow to get into bed at night!

I'm on the fence if this is a good one to DIY or just go ahead and buy.

Burlap/Linen Fabric + Fabric Paint + Freezer Paper + Pillow Form or Batting + TIME

or Just $$$ and wait for UPS ;)

I'll keep ya posted.


Not sure who will win in a down and dirty test of changing diapers, washing dishes,
 mopping floors and general mom duties. 

But I want to look polished doing all those chores without constant chipping!

I love the look of polished fingernails, but I'll admit I have given up the fight since having kids.
Actually, I gave up the fight pre-kids when I was a Veterinary Tech.

Miracle workers or all hype? 
I'm not sure which to try first. 


#5- A Beach Vacation- Need I say more? 
I'm going to go ahead and say this one is a total wish that isn't going to happen anytime soon,
 but a gal can dream!

Warm sand, blue water, a cold margarita in hand. 

I'll drift off to sleep tonight with that mental picture!


What do you think of my wish list? 
I'm sure we could all use a little of #5 during these last weeks of school!


 Linking up with Friday Favorites At these fun blogs!


*Post contains Affiliate links- you click & I might get a little reward ;)


Friday, August 23, 2013

Recycled Crayon Storage + a FREE printable

Today I'm sharing a free craft, 
that like most of my other DIY/Printables 
is designed to help keep your home better organized. 

This is a craft I made about 6 months ago, 
and so far it is holding up great and getting daily use from my 2 girls!

This one is simple- I know it's not a *new* idea, but it is a *cute* and *free* idea.
Both of which make me very happy!


1. Take a large plastic container and clean it out
(I used a Costco Animal Crackers bin, 
but Target has similar animal cracker and cheese ball containers
 if you aren't a member of a Costco/Sam's Club)
This is a great size for LOTS of crayons & the lid screws on tight

2. My Rainbow Chevron 'Crayons' label downloaded for free
(I recommend printing on cardstock 
and printing a front and back copy, 
mostly because I was too lazy to scrape the old labels off
 and I needed to cover both sides!)

3. Scissors and Packaging Tape


Cut label to desired size and tape in layers on the entire surface
 (so the label is almost 'laminated' on)

Fill with crayons, give the kids some paper and CREATE!!!

What ways do you often re-use old plastic containers? Leave a comment and share!


Tuesday, August 13, 2013

Keep Calm and Drink Lemonade: Free Printable

 I shared a photo of a "keep calm" style print I designed for the lemonade stand.


Today I'm sharing it as a FREE download!

download
If you download it, please take the time to pin it on pinterest, 
share via facebook or Twitter,
 or best of all follow my blog(via blogger or bloglovin')
and leave a comment!

Please check out the other party printables available for purchase in my Etsy Shop ModInk Design

Friday, June 7, 2013

Celebrate Dad

Father's Day, as you may or may not remember, is just around the corner. 

In my house it usually involves lots  of family time, maybe a little golf, and a yummy meal or two. 
In past years I have done framed photos for my hubby as a simple but meaningful gift to celebrate his role as the father of our two girls, most of which hang in his office. 

This was 2011, 
when Kinsey was 2 and we were expecting Makayla the following month.


This was last year, 2012,
 where I made a 'D' and 'A' out of a cardboard box 
and painted them for the girls to hold. 


This year I haven't finalized our gift,
 but it will probably contain some pictures from this past year 
and maybe some artwork from the girls. 


So if you are, like me, still looking for a little something special to say 'I Love You' this Father's Day, 
I made up a cute poster you can download and print for FREE!

It comes in 3 colors, Royal Blue, Orange, and Mint Green.
Download
Download
Download
Here's the Mint Green framed as an 8X10 print, and as a 5X7 with Kinsey's artwork as a mat. 


So please, download, enjoy and make sure you celebrate all the Father's you know next Sunday!

Lil\'Luna

Friday, November 2, 2012

The Girls' Shared Room Artwork

About two months ago we moved the girls back into one room together.
mornin' sunshine...nice hair!

 They have previously been together from when M was about 3-6 months old, but because she didn't yet sleep through the night, her cries and my efforts to soothe them often woke K up. In an effort to keep our kids from becoming sleep deprived zombies (like their mother) we moved K downstairs to the guest room/office. It was hard for me. I felt as though she was detached  alone and vulnerable sleeping downstairs with the rest of us upstairs. To go along with my 'mommy guilt' there was also the fact that she continued to wake at least 3 times a week and either call for me from downstairs or creep upstairs in the dark. Both of which broke my heart even more. 

Moving them back in together, while not ideal, seemed to be the best thing for now.

Not only did it curb my guilt over leaving my 4 year old vulnerable at night,
 it was something we need to do because the hubby's new job requires he work from a home office. The downstairs room was our only option for that, well, it was that or the garage. Hopefully I'll get around to a blog post on the downstairs room makeover soon. 

I'll eventually get to the topic of today's post, I promise!!!

The girls furniture was squeezed in together, some taken out for lack of space, and lots of toys were sorted through and given away.


The furniture doesn't match, but I have a feeling that M will be in her crib for another year TOPS. 
(K started to escape at 17 months, which gives me 2 more months of crib confined bliss if M is the same!) 
We will eventually get bunk beds or re arrange the room so M can sleep on the trundle.
That will free up some much desired breathing room in the cramped space, 
maybe, perhaps to be filled with a much desired dollhouse!


Until then, I have done some simple things to decorate the space, and make it more fun for the girls. Both of them LOVE the letters and pictures I have above their beds. 
For the letters, I just grabbed some board letters from Hobby Lobby and 
mod -podged on scraps leftover from M's crib bedding.


I quickly typed up some fun prints for the walls, things I have always sung or said to the girls. 
I'll posting them here so you can grab them if you want!
I used some frames from the dollar store and painted them to coordinate with the room, then used 3M strips to easily(and securely) hang everything on the wall.


M regularly points to it after naps and wants to see her picture up close, 
and K knows that her special letter is there just for her! 
 Kinsey particularly loves the ABC print, 
since she is working hard on learning to write her letters with me lately.


                                                                  Sunshine Download Here

                                                                  Alphabet Download Here

Friday, August 31, 2012

1 Corinthians 13: 4-8


A verse recited during our wedding ceremony 8 years ago. A typical wedding reading, I suppose, but true words nonetheless. Thought I would turn it into a wall hanging so I whipped up some type today-


Hopefully I'll have a finished product to show off on the walls soon!

Download Here


Tuesday, August 17, 2010

DIY-Poster Board Wall Art

So today I am sharing a DIY/tutorial (my first so bare with me) that I recently came up with after seeing the high price of -oh so simple- wall art.

 Besides the price tag shock, I was also never really able to find the exact color palette I was looking for.....thus I created my own art!

 Don't be scared, this project requires NO art skills!!!

All you need is an eye for color/pattern and the ability to use an exacto knife and a glue gun...easy peasy!

Let's get started....first here is the supplies you will need: (some items not shown)

2 sheets of poster board ( I got mine for $1 each at the dollar store)

8-10 sheets of scrapbook paper in coordinating colors/patterns-(I find it's best to go with similar colors but fun patterns- mix it up- don't be scared and make sure you add at least one contrasting color or pattern!)

spray glue (or rubber cement, or mod podge, or a glue stick...whatever you have that glues!)

an exacto knife (for exacto cutting..hehe....make sure you also have cardboard or a cutting board to cut on)

a hot glue gun (and glue sticks...duh)

a ruler and pencil

3mm brand sticky strips for putting your finished product on the wall (I used a  small 4 pack)

Total cost for materials- approximately $10


First you will need to cut your poster board into squares, I chose to cut three in the full size of a scrapbook paper sheet (12" x 12"), Three in a rectangle (12" x 6"), Three in an 8" square, and ended up with Seven in a 6" square. I find it's best to cut odd numbers of squares to balance out the piece without looking too symmetrical.


Next layout the pieces on a large surface...just take your time and layer, nothing is final at this point so mix it up a bit!

Once you have a plan start spraying your poster board with the glue and pressing and smoothing your scrapbook paper on. For the smaller pieces, I glued the full sheet on and then cut the excess with the exacto knife. If you don't like the color spacing you can ix your pieces up again at this point.

Lastly grab that trusty glue gun and start sticking it all together.

If you have OCD you can use a level or straight edge, but if you are lazy like me you can eyeball it.

Use the directions on your 3mm sticky strips to mount onto the wall and voila! You have a super chic, totally original piece of artwork for $10 or less!

Thursday, July 1, 2010

Bedroom Re-Vamp


This is how our bedroom used to look, I love the soothing gray on the walls, and the chartreuse curtains are heavenly when the sun shines through in the mornings.

But that artwork....tired, that mismatched bedside furniture....like a college dorm, and those tinsy-weensy lamps...not good for much of anything.

So........
With a little re-vamp of the artwork (same canvases) and a little switcheroo of the furniture from the guest room, plus some inexpensive lamps from my favorite store (yay Target!) here's the finished room at a cost of only $30! Woo Hoo!!!

LinkWithin

Related Posts Plugin for WordPress, Blogger...